From our Friends at Disney Spoonful
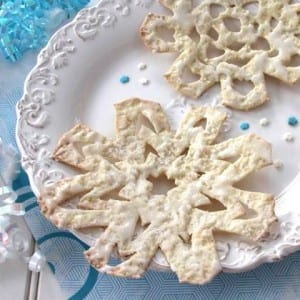
In Norway, where the royal sisters Elsa and Anna reside, crispy flatbread is a traditional and versatile snack that can be served with butter and jam, topped with cheese, or even dipped in soup or stew. Inspired by the Norwegian staple — along with Queen Elsa’s knack for whipping up a winter storm — this simple recipe turns homemade flatbread into a flurry of sweet snowflakes “frosted” with a lemony glaze.
What you’ll need
- 1¼ cups all-purpose flour, plus extra for rolling the dough
- ½ teaspoon baking soda
- ¼ teaspoon salt
- Dash of nutmeg
- 2 tablespoons melted butter
- 1/3 cup buttermilk (or 1/3 cup milk with a few drops of apple cider vinegar stirred in)
- ½ cup powdered sugar
- 1 teaspoon lemon juice
- 1 to 2 teaspoons water
- Decorator sugar or granulated sugar
How to make it
- Whisk together the flour, baking soda, salt, and nutmeg in a mixing bowl, then make a well in the center. Pour the butter and buttermilk into the well, and stir the dry ingredients into them, adding a little more buttermilk or flour, if needed, to create a dough that’s fairly stiff but still pliable. Turn the dough out onto a floured surface and knead it briefly.
- Heat the oven to 350 degrees. Cut the dough into eight equal-size pieces. Working on a floured surface with one piece at a time (while keeping the others covered), roll the dough into a thin, thin circle. Dust the top with flour, then fold the circle in half three times, lightly dusting the dough with flour each time so it won’t stick together.
- Trim off the curved edge of the folded dough to create a triangle. Then use a kitchen knife to cut notches in the dough in the same manner you would to make a paper snowflake. Carefully unfold the dough to reveal the snowflake. Now you can use tiny fondant cutters to cut additional shapes in the snowflake, if you like.
- Bake the flatbread snowflakes on ungreased baking sheets until lightly browned, about 8 to 10 minutes. Then transfer them to a wire rack to cool.
- For the glaze, combine the powdered sugar, lemon juice, and 1 teaspoon of water in a small bowl, stirring until smooth and thin enough to spread easily with a pastry brush. If the glaze is too thick, stir in a little more water.
- Brush the cooled snowflakes with glaze and sprinkle them with decorator or granulated sugar before the glaze sets.
Latest posts by Michele (see all)


