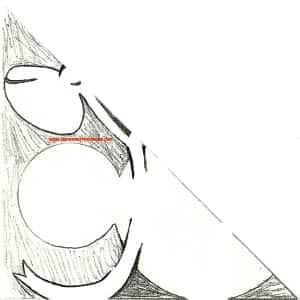
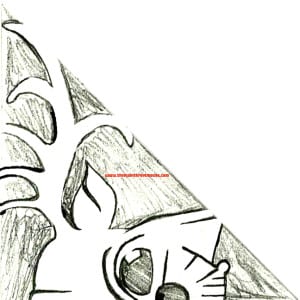
Recently Nation Member Danielle Miller shared with use her directions on how to some of her AMAZING Disney themed paper snowflakes she had created. Her last article was so popular that Danielle was nice enough to make some holiday themed templates for us to share with you! Danielle made us so many of these wonderful templates for you that we will be sharing them with you over the next few days. Today we would like to share with you Danielle’s Minnie Ornament and Darth Reindeer templates. ~Aut
Make Your Own Disney Themed Snowflakes by Guest Blogger Danielle Miller
Welcome to my Snowflake tutorial! I always use 8.5×11 copy paper because it’s easy. You can use any paper that’s easy to fold; we will trim them later to get a square. If you have a favorite way to fold a snowflake, go ahead and use it. I like this method because I like to draw on the triagle shape; I think it looks nicer cut out.
- Fold the short length up along the long side to make a triangle. ( Bottom right up to the left side)

- Fold the point up to the opposite side. (Bottom left up to the top right)

- Now we will cut off the extra flap at the top This will give us a square snowflake.

- There are two ways to fold this next 2 steps. I like to fold back the corners one at a time to get crisper folds, but you can choose to just fold the triangle in half again. ( fold the top right corner to the top left)

- Flip the paper over and fold the remaining corner the same way. This is your last fold take a minute to be sure all your folds are sharp.

- If this is your first try at the fancy snowflake, or you are teaching a child, take a second to mark your edges so you can see them better when you are cutting later. I marked the folded edges with pink, and the open edge with blue. This is important because the pink (folded) edges must stay connected by your design. If you cut away all the pink edges, or your design doesn’t touch both sides, your snowflake will fall apart and you will have fancy confetti.

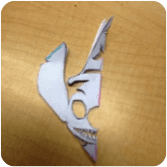
- Now is the creative drawing part. If you excited to draw your own design, go for it! For something simple, try a Mickey head, or if you are artistically inclined try something harder, like Stitch. (I’ve made a few templates to try out if you don’t want to draw.) The main idea to remember is that your design MUST touch both pinks sides (folded sides) to hold together, and every element in your design has to touch the rest of it. I find it easier to do half of a face or character, and let the snowflake mirror the rest when unfolded. There is no reason that you can’t do a full face, but I like to add eyes, mouths, and noses. This is so much easier when you can do it from the edge. Some details don’t connect well with others like eyes, so I have to cut a slit to get to the right spot. It isn’t part of the design, but a way to work around to a spot you can’t reach with scissors. I had to do that here with Stich to reach the eyes. I cut a line connected from the nose. I only do that when I have to, because it does make the snowflake more delicate. You can also stack elements together, like a ghost on top of a pumpkin, or a cat. As long as you design elements touch, you will be fine. It is easier to see you design if you make your lines bold, and shade the areas that you will cut out.

- Now is the cutting part! Please keep an eye on little ones here. Some of these can be tricky and we don’t want hurt fingers. Small pointy scissors work best for me, but anything that will cut several layers of paper easily will do here. Start with the small details first, like eyes, noses, etc. Here I started with the hat details, and the mouth. Be patient with yourselves and take small cuts, little details can be cut out in little section. For example, when I cut the teeth out, I cut to the back of the smile, them went in to do the teeth in little nibbles. Cut the big chunks last. Keep an eye on your pink edges to hold everything together.


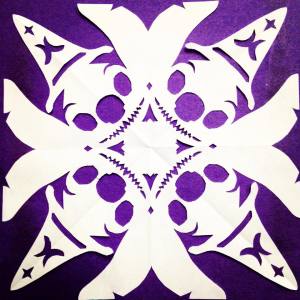
- It’s the exciting part!!!! Unfold carefully and voila! A super nifty awesome snowflake that you made yourself! If you want to mount it on colored paper, I first recommend leaving it in a heavy book for few days to flatten it.


 Minnie Ornament
  Darth Reindeer


