
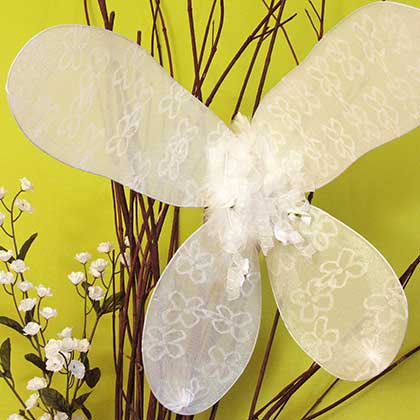
Recently our friends at Disney Family shared the following directions for making your own fairy wings. Upon reviewing them I though to myself, by changing the color of the fabric, shape of the wire etc. Disney fans could make ANY fairy wings they wanted, to include Maleficent wings!
1.Cut two 29-inch lengths of wire to use for the top set of wings and two 26-inch lengths for the bottom set.
2. Form a circle with each wire length, overlapping the ends by an inch and taping them firmly together.

3. Make sure the edges of the tape are well pressed down so there are no rough edges for the wing material to catch on.

4. Stretch one of the legs of the tights over one of the larger circles so that the top of the wing fits snuggly into the toe. (The wire circle will naturally narrow in the process due to the tension exerted by the stretchy material.) Gather the tight at the bottom of the wing, pulling it taut. Then cut the material 2 or 3 inches from where you are holding it and tightly knot it. Use the other leg of the tight to cover the second larger circle in the same manner.

5. Cut the remaining leg portions from the tights (they should resemble short tubes) and use them to cover the smaller wire circles as you did the larger ones. Note: Because there’s no toe in these sections, first you’ll need to turn each tube inside out, tightly knot the top, and then turn the tube right side out again.
6. Next, cut a pair of 18-inch lengths from the sewing elastic to use for shoulder straps. Glue the ends of each strap to the sides of one of the felt squares, as shown.

7. Glue the bases of a top and bottom wing securely to one side of the felt square (make sure you don’t mistakenly glue down the elastic strap in the process). Glue the remaining two wings to the opposite side.

8. For the finishing touch, glue the second felt square on top of the wing bases and decorate it with faux fur, craft feathers, and/or ribbon.


Michele also contributes theme park news for Fox 35 Orlando 11pm news and on the radio on WDBO.
- EPCOT Food & Wine Fest Dates, Details Announced - April 23, 2024
- Daydream Believing! - April 19, 2024
- Disney Adventure World: Disneyland Paris Reimagines 2nd Park - April 12, 2024